Quick View
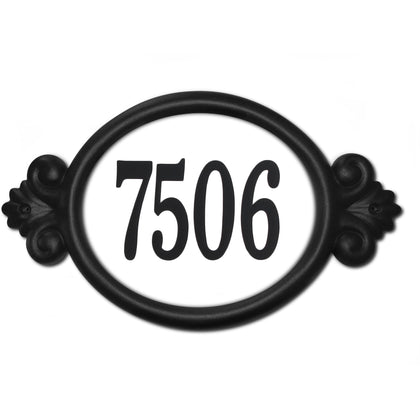
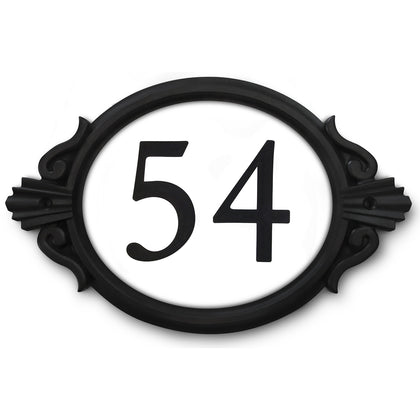
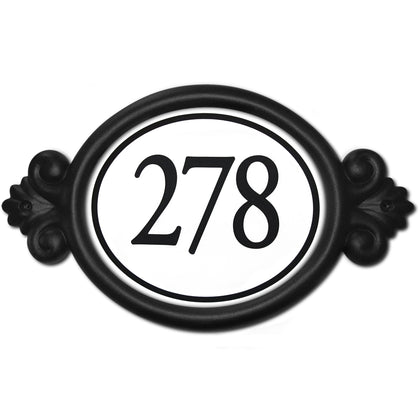
{"id":2942776049728,"title":"Engraved Classic Frame Horizontal Address Plaque","handle":"engraved-address-plaque","description":"\u003cp style=\"margin-bottom: 40px; text-align: center; font-weight: bold; color: #ff2a00; padding: 10px; font-size: 1.25rem; line-height: 1.825rem;\"\u003e\u003cspan\u003e***Please note that this a custom product and it takes about 2-3 weeks for your order to be processed.***\u003c\/span\u003e\u003c\/p\u003e\n\u003cstyle\u003e\u003c!--\nth {\n padding: 7px !important;\n}\n--\u003e\u003c\/style\u003e\n\u003ch2\u003eOrder Custom Address Plaques For Your Home!\u003c\/h2\u003e\n\u003cp\u003eAdd the finishing touch to your home’s exterior with a custom address plaque. Sight Lights carries classic address plaques that are ideal for all types of homes. All our address plaques are made in Canada with superior materials so they withstand even the harshest Canadian weather.\u003c\/p\u003e\n\u003cp\u003eIn addition to custom address plaques and address plates, we can also deliver bulk orders for home builders or contractors.\u003cspan\u003e \u003c\/span\u003e\u003ca href=\"\/collections\/for-home-builders\"\u003eLearn more about our bulk ordering for home builders\u003c\/a\u003e.\u003c\/p\u003e\n\u003cp\u003e\u003cstrong\u003eFeatures:\u003c\/strong\u003e\u003c\/p\u003e\n\u003cdiv style=\"display: flex; flex-wrap: wrap;\"\u003e\n\u003cdiv class=\"col-xs-12 col-sm-12 col-md-6\"\u003e\n\u003cul style=\"padding-bottom: 0;\"\u003e\n\u003cli\u003eProvides easy identification of your home while enhancing its exterior.\u003c\/li\u003e\n\u003cli\u003eHighly visible to EMERGENCY SERVICES, deliveries and friends.\u003c\/li\u003e\n\u003cli\u003eSolid cast aluminum frame with powder coated finish.\u003c\/li\u003e\n\u003cli\u003eNumbers are engraved on acrylic mounting plate.\u003c\/li\u003e\n\u003c\/ul\u003e\n\u003c\/div\u003e\n\u003cdiv class=\"col-xs-12 col-sm-12 col-md-6\"\u003e\n\u003cul style=\"padding-bottom: 0;\"\u003e\n\u003cli\u003eStainless steel screws and mounting hardware included.\u003c\/li\u003e\n\u003cli\u003eCompletely weatherproof.\u003c\/li\u003e\n\u003cli\u003eCan accommodate up to 20 characters in total.\u003c\/li\u003e\n\u003cli\u003eOptional additional automatic on\/off illuminated night cap (See\u003cspan\u003e \u003c\/span\u003e\u003ca href=\"\/products\/illuminated-address-cap-kit\"\u003eIlluminated Address Cap Kit\u003c\/a\u003e)\u003c\/li\u003e\n\u003c\/ul\u003e\n\u003c\/div\u003e\n\u003c\/div\u003e\n\u003ch5\u003eAdditional information\u003c\/h5\u003e\n\u003cdiv class=\"table-responsive\"\u003e\n\u003ctable class=\"shop_attributes\" style=\"width: 784px;\" height=\"303\"\u003e\n\u003ctbody\u003e\n\u003ctr class=\"\"\u003e\n\u003cth style=\"text-align: left; width: 27px; padding-top: 18px;\"\u003eWeight\u003c\/th\u003e\n\u003ctd class=\"product_weight\" style=\"width: 749px; padding-top: 18px;\"\u003e2 lbs\u003c\/td\u003e\n\u003c\/tr\u003e\n\u003ctr class=\"alt\"\u003e\n\u003cth style=\"text-align: left; width: 27px;\"\u003eDimensions\u003c\/th\u003e\n\u003ctd class=\"product_dimensions\" style=\"width: 749px;\"\u003e16 x 10 x 1 in.\u003c\/td\u003e\n\u003c\/tr\u003e\n\u003ctr class=\"\"\u003e\n\u003cth style=\"width: 27px; text-align: left;\"\u003eFrame Color\u003c\/th\u003e\n\u003ctd style=\"width: 749px;\"\u003e\n\u003cp\u003eBlack, Bronze, Copper\u003c\/p\u003e\n\u003c\/td\u003e\n\u003c\/tr\u003e\n\u003ctr class=\"alt\"\u003e\n\u003cth style=\"width: 27px; text-align: left;\"\u003eBackground\u003cbr\u003e Colour\u003c\/th\u003e\n\u003ctd style=\"width: 749px;\"\u003e\n\u003cp\u003eTraditional: Black (with white numbers), Traditional: White (with black numbers)\u003c\/p\u003e\n\u003c\/td\u003e\n\u003c\/tr\u003e\n\u003c\/tbody\u003e\n\u003c\/table\u003e\n\u003c\/div\u003e","published_at":"2019-02-17T23:03:47-05:00","created_at":"2019-02-17T23:10:23-05:00","vendor":"The Sight Lights","type":"Classic","tags":["number-only-6-characters"],"price":7999,"price_min":7999,"price_max":7999,"available":true,"price_varies":false,"compare_at_price":null,"compare_at_price_min":0,"compare_at_price_max":0,"compare_at_price_varies":false,"variants":[{"id":26057534439488,"title":"Black \/ White with black numbers","option1":"Black","option2":"White with black numbers","option3":null,"sku":"","requires_shipping":true,"taxable":true,"featured_image":{"id":9827558031424,"product_id":2942776049728,"position":1,"created_at":"2019-02-27T13:32:50-05:00","updated_at":"2019-03-07T11:46:28-05:00","alt":null,"width":2210,"height":2210,"src":"\/\/thesightlights.com\/cdn\/shop\/products\/Classic-Black-Frame-white-background.jpg?v=1551977188","variant_ids":[26057534439488]},"available":true,"name":"Engraved Classic Frame Horizontal Address Plaque - Black \/ White with black numbers","public_title":"Black \/ White with black numbers","options":["Black","White with black numbers"],"price":7999,"weight":0,"compare_at_price":null,"inventory_management":null,"barcode":"","featured_media":{"alt":null,"id":4396988268608,"position":1,"preview_image":{"aspect_ratio":1.0,"height":2210,"width":2210,"src":"\/\/thesightlights.com\/cdn\/shop\/products\/Classic-Black-Frame-white-background.jpg?v=1551977188"}},"requires_selling_plan":false,"selling_plan_allocations":[]},{"id":26057534373952,"title":"Black \/ Black with white numbers","option1":"Black","option2":"Black with white numbers","option3":null,"sku":"","requires_shipping":true,"taxable":true,"featured_image":{"id":9827559243840,"product_id":2942776049728,"position":3,"created_at":"2019-02-27T13:32:53-05:00","updated_at":"2019-03-07T11:46:27-05:00","alt":null,"width":2389,"height":2389,"src":"\/\/thesightlights.com\/cdn\/shop\/products\/Classic-Black_Frame-with-white_numbers-black_background.jpg?v=1551977187","variant_ids":[26057534373952]},"available":true,"name":"Engraved Classic Frame Horizontal Address Plaque - Black \/ Black with white numbers","public_title":"Black \/ Black with white numbers","options":["Black","Black with white numbers"],"price":7999,"weight":0,"compare_at_price":null,"inventory_management":null,"barcode":"","featured_media":{"alt":null,"id":4396989218880,"position":3,"preview_image":{"aspect_ratio":1.0,"height":2389,"width":2389,"src":"\/\/thesightlights.com\/cdn\/shop\/products\/Classic-Black_Frame-with-white_numbers-black_background.jpg?v=1551977187"}},"requires_selling_plan":false,"selling_plan_allocations":[]},{"id":26057534570560,"title":"Bronze \/ White with black numbers","option1":"Bronze","option2":"White with black numbers","option3":null,"sku":"","requires_shipping":true,"taxable":true,"featured_image":null,"available":true,"name":"Engraved Classic Frame Horizontal Address Plaque - Bronze \/ White with black numbers","public_title":"Bronze \/ White with black numbers","options":["Bronze","White with black numbers"],"price":7999,"weight":0,"compare_at_price":null,"inventory_management":null,"barcode":"","requires_selling_plan":false,"selling_plan_allocations":[]},{"id":26057534505024,"title":"Bronze \/ Black with white numbers","option1":"Bronze","option2":"Black with white numbers","option3":null,"sku":"","requires_shipping":true,"taxable":true,"featured_image":null,"available":true,"name":"Engraved Classic Frame Horizontal Address Plaque - Bronze \/ Black with white numbers","public_title":"Bronze \/ Black with white numbers","options":["Bronze","Black with white numbers"],"price":7999,"weight":0,"compare_at_price":null,"inventory_management":null,"barcode":"","requires_selling_plan":false,"selling_plan_allocations":[]},{"id":26057534701632,"title":"Copper \/ White with black numbers","option1":"Copper","option2":"White with black numbers","option3":null,"sku":"","requires_shipping":true,"taxable":true,"featured_image":{"id":9827557310528,"product_id":2942776049728,"position":2,"created_at":"2019-02-27T13:32:47-05:00","updated_at":"2019-03-07T11:46:29-05:00","alt":null,"width":2428,"height":2428,"src":"\/\/thesightlights.com\/cdn\/shop\/products\/Classic-Copper-white-background.jpg?v=1551977189","variant_ids":[26057534701632]},"available":true,"name":"Engraved Classic Frame Horizontal Address Plaque - Copper \/ White with black numbers","public_title":"Copper \/ White with black numbers","options":["Copper","White with black numbers"],"price":7999,"weight":0,"compare_at_price":null,"inventory_management":null,"barcode":"","featured_media":{"alt":null,"id":4396987809856,"position":2,"preview_image":{"aspect_ratio":1.0,"height":2428,"width":2428,"src":"\/\/thesightlights.com\/cdn\/shop\/products\/Classic-Copper-white-background.jpg?v=1551977189"}},"requires_selling_plan":false,"selling_plan_allocations":[]},{"id":26057534636096,"title":"Copper \/ Black with white numbers","option1":"Copper","option2":"Black with white numbers","option3":null,"sku":"","requires_shipping":true,"taxable":true,"featured_image":{"id":10309898305600,"product_id":2942776049728,"position":5,"created_at":"2019-03-16T23:39:53-04:00","updated_at":"2019-03-16T23:39:53-04:00","alt":null,"width":2048,"height":2048,"src":"\/\/thesightlights.com\/cdn\/shop\/products\/classic-copper-horizontal-black-on-white.jpg?v=1552793993","variant_ids":[26057534636096]},"available":true,"name":"Engraved Classic Frame Horizontal Address Plaque - Copper \/ Black with white numbers","public_title":"Copper \/ Black with white numbers","options":["Copper","Black with white numbers"],"price":7999,"weight":0,"compare_at_price":null,"inventory_management":null,"barcode":"","featured_media":{"alt":null,"id":4602911785024,"position":5,"preview_image":{"aspect_ratio":1.0,"height":2048,"width":2048,"src":"\/\/thesightlights.com\/cdn\/shop\/products\/classic-copper-horizontal-black-on-white.jpg?v=1552793993"}},"requires_selling_plan":false,"selling_plan_allocations":[]}],"images":["\/\/thesightlights.com\/cdn\/shop\/products\/Classic-Black-Frame-white-background.jpg?v=1551977188","\/\/thesightlights.com\/cdn\/shop\/products\/Classic-Copper-white-background.jpg?v=1551977189","\/\/thesightlights.com\/cdn\/shop\/products\/Classic-Black_Frame-with-white_numbers-black_background.jpg?v=1551977187","\/\/thesightlights.com\/cdn\/shop\/products\/classic-copper-horizontal-white-on-black.jpg?v=1552793425","\/\/thesightlights.com\/cdn\/shop\/products\/classic-copper-horizontal-black-on-white.jpg?v=1552793993"],"featured_image":"\/\/thesightlights.com\/cdn\/shop\/products\/Classic-Black-Frame-white-background.jpg?v=1551977188","options":["Frame color","Background color"],"media":[{"alt":null,"id":4396988268608,"position":1,"preview_image":{"aspect_ratio":1.0,"height":2210,"width":2210,"src":"\/\/thesightlights.com\/cdn\/shop\/products\/Classic-Black-Frame-white-background.jpg?v=1551977188"},"aspect_ratio":1.0,"height":2210,"media_type":"image","src":"\/\/thesightlights.com\/cdn\/shop\/products\/Classic-Black-Frame-white-background.jpg?v=1551977188","width":2210},{"alt":null,"id":4396987809856,"position":2,"preview_image":{"aspect_ratio":1.0,"height":2428,"width":2428,"src":"\/\/thesightlights.com\/cdn\/shop\/products\/Classic-Copper-white-background.jpg?v=1551977189"},"aspect_ratio":1.0,"height":2428,"media_type":"image","src":"\/\/thesightlights.com\/cdn\/shop\/products\/Classic-Copper-white-background.jpg?v=1551977189","width":2428},{"alt":null,"id":4396989218880,"position":3,"preview_image":{"aspect_ratio":1.0,"height":2389,"width":2389,"src":"\/\/thesightlights.com\/cdn\/shop\/products\/Classic-Black_Frame-with-white_numbers-black_background.jpg?v=1551977187"},"aspect_ratio":1.0,"height":2389,"media_type":"image","src":"\/\/thesightlights.com\/cdn\/shop\/products\/Classic-Black_Frame-with-white_numbers-black_background.jpg?v=1551977187","width":2389},{"alt":null,"id":4602861944896,"position":4,"preview_image":{"aspect_ratio":1.0,"height":2048,"width":2048,"src":"\/\/thesightlights.com\/cdn\/shop\/products\/classic-copper-horizontal-white-on-black.jpg?v=1552793425"},"aspect_ratio":1.0,"height":2048,"media_type":"image","src":"\/\/thesightlights.com\/cdn\/shop\/products\/classic-copper-horizontal-white-on-black.jpg?v=1552793425","width":2048},{"alt":null,"id":4602911785024,"position":5,"preview_image":{"aspect_ratio":1.0,"height":2048,"width":2048,"src":"\/\/thesightlights.com\/cdn\/shop\/products\/classic-copper-horizontal-black-on-white.jpg?v=1552793993"},"aspect_ratio":1.0,"height":2048,"media_type":"image","src":"\/\/thesightlights.com\/cdn\/shop\/products\/classic-copper-horizontal-black-on-white.jpg?v=1552793993","width":2048}],"requires_selling_plan":false,"selling_plan_groups":[],"content":"\u003cp style=\"margin-bottom: 40px; text-align: center; font-weight: bold; color: #ff2a00; padding: 10px; font-size: 1.25rem; line-height: 1.825rem;\"\u003e\u003cspan\u003e***Please note that this a custom product and it takes about 2-3 weeks for your order to be processed.***\u003c\/span\u003e\u003c\/p\u003e\n\u003cstyle\u003e\u003c!--\nth {\n padding: 7px !important;\n}\n--\u003e\u003c\/style\u003e\n\u003ch2\u003eOrder Custom Address Plaques For Your Home!\u003c\/h2\u003e\n\u003cp\u003eAdd the finishing touch to your home’s exterior with a custom address plaque. Sight Lights carries classic address plaques that are ideal for all types of homes. All our address plaques are made in Canada with superior materials so they withstand even the harshest Canadian weather.\u003c\/p\u003e\n\u003cp\u003eIn addition to custom address plaques and address plates, we can also deliver bulk orders for home builders or contractors.\u003cspan\u003e \u003c\/span\u003e\u003ca href=\"\/collections\/for-home-builders\"\u003eLearn more about our bulk ordering for home builders\u003c\/a\u003e.\u003c\/p\u003e\n\u003cp\u003e\u003cstrong\u003eFeatures:\u003c\/strong\u003e\u003c\/p\u003e\n\u003cdiv style=\"display: flex; flex-wrap: wrap;\"\u003e\n\u003cdiv class=\"col-xs-12 col-sm-12 col-md-6\"\u003e\n\u003cul style=\"padding-bottom: 0;\"\u003e\n\u003cli\u003eProvides easy identification of your home while enhancing its exterior.\u003c\/li\u003e\n\u003cli\u003eHighly visible to EMERGENCY SERVICES, deliveries and friends.\u003c\/li\u003e\n\u003cli\u003eSolid cast aluminum frame with powder coated finish.\u003c\/li\u003e\n\u003cli\u003eNumbers are engraved on acrylic mounting plate.\u003c\/li\u003e\n\u003c\/ul\u003e\n\u003c\/div\u003e\n\u003cdiv class=\"col-xs-12 col-sm-12 col-md-6\"\u003e\n\u003cul style=\"padding-bottom: 0;\"\u003e\n\u003cli\u003eStainless steel screws and mounting hardware included.\u003c\/li\u003e\n\u003cli\u003eCompletely weatherproof.\u003c\/li\u003e\n\u003cli\u003eCan accommodate up to 20 characters in total.\u003c\/li\u003e\n\u003cli\u003eOptional additional automatic on\/off illuminated night cap (See\u003cspan\u003e \u003c\/span\u003e\u003ca href=\"\/products\/illuminated-address-cap-kit\"\u003eIlluminated Address Cap Kit\u003c\/a\u003e)\u003c\/li\u003e\n\u003c\/ul\u003e\n\u003c\/div\u003e\n\u003c\/div\u003e\n\u003ch5\u003eAdditional information\u003c\/h5\u003e\n\u003cdiv class=\"table-responsive\"\u003e\n\u003ctable class=\"shop_attributes\" style=\"width: 784px;\" height=\"303\"\u003e\n\u003ctbody\u003e\n\u003ctr class=\"\"\u003e\n\u003cth style=\"text-align: left; width: 27px; padding-top: 18px;\"\u003eWeight\u003c\/th\u003e\n\u003ctd class=\"product_weight\" style=\"width: 749px; padding-top: 18px;\"\u003e2 lbs\u003c\/td\u003e\n\u003c\/tr\u003e\n\u003ctr class=\"alt\"\u003e\n\u003cth style=\"text-align: left; width: 27px;\"\u003eDimensions\u003c\/th\u003e\n\u003ctd class=\"product_dimensions\" style=\"width: 749px;\"\u003e16 x 10 x 1 in.\u003c\/td\u003e\n\u003c\/tr\u003e\n\u003ctr class=\"\"\u003e\n\u003cth style=\"width: 27px; text-align: left;\"\u003eFrame Color\u003c\/th\u003e\n\u003ctd style=\"width: 749px;\"\u003e\n\u003cp\u003eBlack, Bronze, Copper\u003c\/p\u003e\n\u003c\/td\u003e\n\u003c\/tr\u003e\n\u003ctr class=\"alt\"\u003e\n\u003cth style=\"width: 27px; text-align: left;\"\u003eBackground\u003cbr\u003e Colour\u003c\/th\u003e\n\u003ctd style=\"width: 749px;\"\u003e\n\u003cp\u003eTraditional: Black (with white numbers), Traditional: White (with black numbers)\u003c\/p\u003e\n\u003c\/td\u003e\n\u003c\/tr\u003e\n\u003c\/tbody\u003e\n\u003c\/table\u003e\n\u003c\/div\u003e"}


